I have now loaded all the newest photos into the web album.
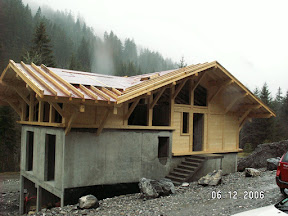 This is how is looks from Rob's chalet. The roof is a single layer of tongue and groove (T&G) boarding covered with a red roofing felt. It is about 95% water proof as it was tipping it down for most of the trip and there are only 2 minor leaks in the roof. There is a big hole right around the building
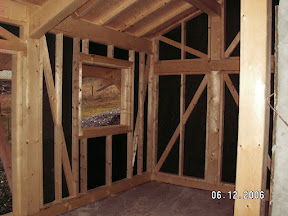 Inside the carpenters have only built the outside skin of T&G and lined the walls with building paper. This is the kitchen as seen from the door from the entrance hall. There are no windows or doors in the whole building. This corner is where the waste pipe for the kitchen has been built into the floor. This is where the kitchen and the entrance hall will get the power. Gaine will be feed up through the floor in this corner and will spread out through the walls. I have been strongly advised to fit the gaine before the carpenters T&G the inside wall.
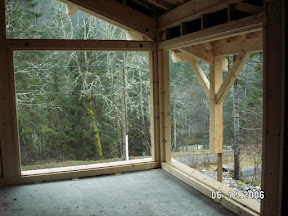 This is the dining room. Through the windows there will be a largish balcony on this corner of the building. The balconies have not yet been constructed. As you can just about see, the support coming down from the roof that will form an upright on the balcony is propped up on this skinny plank of timber. We are waiting for the triangle bits that fix to the concrete wall and prop up the ends! These big windows will slide open nearly all the way and with them both open it will feel like outside. In the summer it will be fantastic.
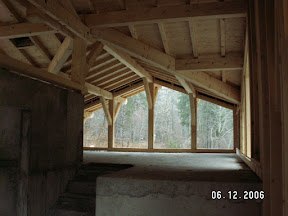 This is the view of the salon from the dining room. You can see the "wall of glass" on the far end and just make out the steps in the foreground. This is a lovely room. It is big and roomy and light, definitely room to swing a cat and kind of makes up for the smaller bedrooms. On the right hand side just below the picture is another opening in the floor. This one was originally intended to take the moisture from the bathrooms and send it up to a second chimney directly above. I dropped the second chimney on grounds of cost but will make use of the box outs in the concrete to route my cables though The dining room and saloon will be powered by cables coming from here.
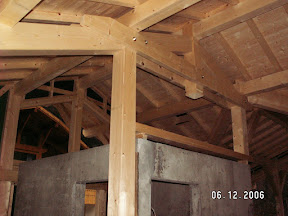 This photo shows the jointing and detail on the mezzanine level. This big brace ties the roof together and I think it looks superb. The mezzanine will go on top of the concrete walls although the finished floor height will not be very much higher than the top of the present concrete as the window sills of the 2 big windows facing Robs place are quite low.
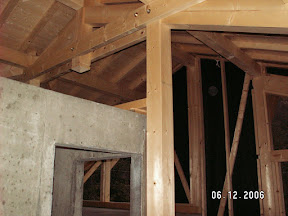 This vertical column is intriguing, on the plans it is shown coming down on to the corner of the concrete entrance hall. As built it does not. So what went wrong? Is the timber wrong or the concrete? My guess is that the concrete is wrong. I will not know for sure until I measure up the kitchen but my guess is that the concrete wall is about 300 mm out and when the carpenters tried to put the column in it wouldn't fit. When I saw this corner on the plans I recognized it as a major feature of the house. I was going to ask for it to be timber all the way from floor to roof and that the concrete be poured to it. I didn't as time and cost was against me. As it is it has worked out quite well, I have the feature I wanted plus a bit more and maybe I have a slightly bigger kitchen.
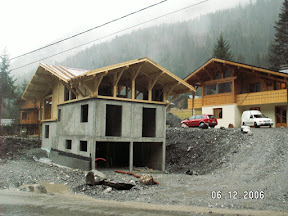 This is the two chalets together. Mine will look a bit less tall and skinny when the ground is back filled and the balconies will also help. A second balcony is going on just above the garage and below the pair of French windows. (aren't they actually all French windows)
Hervè has changed the front page of his invoices so that the have my name on them so these can go to the bank to be paid.
He assures me that the windows will be in and the building backfilled before Christmas. Whilst Andy the electrician was around I pummeled him for information about how best to wire up my chalet. He was a mine of useful information. Especially about the earth system in my chalet or rather the lack of any earth in my chalet. Putting in the earth cable does not look that difficult just running a 25mm2 cable around the building and burying the cable about meter deep. As the builder wants to back fill before Christmas and I have no free weekends before then I asked Hervè to organize an electrician to install the earth for me. In back filling around the building the builders will sort out the slopes and attempt to stabilize the steep slopes using some of the rocks discovered whilst digging the foundations.
The water is apparently connected to the mains, and he assures me that the is a stop tap for each connection in the road. Rob and I could only find one stop tap lid so I wonder what is happening there?
The sewage will be connected temporarily to the septic tank.
The carpenters will complete the T&G at my convenience, although with the roof on and the windows in they can finish this winter if I like. So my plan is to get the gaine in as soon as possible and hopefully the wires with it as it it much easier to thread the cable while the gaine is straight rather than fixed on the wall. So January may well see me wiring the chalet or at least the top floors. As it is I need to sit down and design my circuits. Andy had a very good book which was up to date on the latest French regs, L'installation électrique which I will be getting and using to help.
My next trip out to see Hervè will be in January, but I might get out between Christmas and new year for a day trip, maybe?
1 comment:
Hi Richard, I'm well impressed with the progress of your chalet! It's been a couple years and a lot of problems to get sorted out, but now you have the shell already. (That is, if you didn't take photos from someone else's building or used your PaintShop knowledge ;-). Still a lot of stuff to do, but as soon as the windows are in, the roof is tiled and you have water and electricity, you are able to do things whenever you find time/money. Guenther
Post a Comment